A septic installation starts with information and ends with a record. Here is what should happen between those points.
Most property owners see the excavation and the tank delivery. By then, the important decisions should already be made: the building use defined, the soil examined, the setbacks checked, and a design prepared for that specific property.
A clear process protects the owner from paying for construction before the design question is settled.
1. Define the project
The Planner needs to know what the system will serve. For a home, that means bedrooms, suites, expected occupancy, and any special water uses. Commercial work adds operating hours, staff, customers, kitchens, laundry, showers and peak events.
The property address and legal information open the paper trail: available records, parcel boundaries, covenants, easements, wells, watercourses and other constraints. A proposed addition or subdivision can also bring in local-government requirements outside the Sewerage System Regulation.
What to have ready before we book your site visit:
- Civic address and PID.
- Whether it is a new build, replacement, or repair.
- Number of bedrooms, existing or planned.
- Water source: well or community system, plus the well log if you have it.
- Location of any wells on your property or the neighbouring ones.
- Site plan or survey, if one exists.
- Title to the property, so we can see easements and covenants that affect setbacks.
- Whether a building permit is already in motion, and the timeline.
- Any existing septic records or soil reports.
- Site access notes, including gates, dogs, and whether you will be on site.
2. Investigate the site and soil
The site investigation identifies the areas that may be suitable for treatment and dispersal. Test pits expose the soil horizons, and the Planner records texture, structure, consistency, depth, and any signs of seasonal saturation. Permeability or percolation testing describes how water actually moves through that soil.
Elevation work ties it together: the relationship between the building sewer, the tanks, the treatment components, and the field. Slope and the receiving area below the field shape how effluent should be distributed.
3. Select and document the system
The proposed daily flow and the site’s capability guide the treatment and dispersal choices. A design might use gravity or pressure distribution, conventional trenches, a bed, a sand mound, treatment equipment, pumps, or other components suited to the ground.
The plans and specifications should nail down component sizes, locations, elevations, materials, installation requirements, and the maintenance obligations that come with ownership. And the owner should hear, in plain terms, why the recommended system fits the property.
4. File before construction
For a sewerage system covered by the filing provisions of the BC regulation, an Authorized Person files the required information with the health authority before construction: site and owner information, sealed plans and specifications, and written assurance that the design is consistent with standard practice.
This is commonly called an RSS filing or a septic filing. It is not every permit the property might need. Building, electrical, development, access, and environmental requirements can run alongside the sewerage-system filing on their own tracks.
5. Prepare the site and install the system
Construction follows the sequence in the design and the physical realities of the site. Access routes protect the dispersal area. Tank bases are prepared and checked. Pipe grades, elevations, pumps, floats, control settings and distribution components go in to specification.
This is the stage most people picture when they think about a septic installation.
When conditions differ materially from the design information, the Installer stops and calls the Planner. Changes are easy to assess while the excavation is open. They are nearly impossible to reconstruct from memory after backfill.
6. Review, test and record the work
Construction review documents the system before it disappears underground. Depending on the design, the checks can include tank level, inlet and outlet elevations, leakage, pump operation, alarm function, control settings, dose volume, lateral pressure and distribution.
Photographs and measurements feed the as-built plan. The final record should show what was actually installed, including any approved changes from the filed design.
7. Certify and hand over the system
The BC regulation requires the Authorized Person to complete certification within 30 days after construction for a system to which the filing section applies. The owner receives the plans and specifications, a maintenance plan, and a copy of the certification.
The health authority receives the signed certification, the as-built plan, and the maintenance plan. Keep the complete package with the property, and hand it to future maintenance providers or purchasers.
8. Operate and maintain what was installed
A septic system isn’t finished when the yard is graded. Tanks accumulate solids. Pumps and floats wear. Filters need cleaning. Treatment units and controls carry manufacturer and maintenance requirements. The owner is responsible for maintaining the system to its plan and keeping the records to prove it.
If you are starting a new build or replacing a system, ask for the project stages in writing. A complete proposal tells you where design ends, where installation begins, and who closes the certification record.
Before we can design a septic system, we go through a series of questions with the property owner to properly evaluate the volume of water and sewage from the home or space. From the number of bedrooms, occupants, and often types of fixtures.
A plot plan or survey of the property is an important part of the assessment, along with a title search. A title search can be very informative because we can assess covenants, easements, or any other conditions that can cause setback requirements from the septic system.
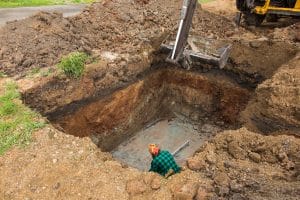
Once we arrive on site with an excavator, we conduct test pits to evaluate the soil horizons and structure. A permeameter test and/or percolation test is also conducted to determine the rate at which water is absorbed into the soil under saturated conditions. We also evaluate the topography, from slope to what grows in the area. These tests are vital in determining the right septic system for the property.
All of this information gets put into a lengthy report along with drawings, which are submitted to the local health authority for review and acceptance.
We can now install the septic system once the calculations are done and the filing is submitted. Once the system is in place, we then generate further documentation. We create a letter of certification (LOC), a plan for maintenance and operation of the septic system, and we also provide the owner with a schematic of where the system components are located.
Luis Goncalves, ROWP, IN, PL